
I contemplated calling them “Cheezy” Kale Chips, but I’m so sick of putting names of vegan things into quotations! Anyone else? It’s still REAL food! Yes, cheese generally refers to a substance made from cow’s milk, but it can also be made out of nut milk, or – in this case – blended cashews. So there! “Cheeze” and “mylk” are two words you’ll never hear come out of this vegan’s mouth. Let’s reclaim the language! :)

I had a nice, big bag of raw cashews generously sent to me by Oh! Nuts and I thought a batch (or two) of my favorite raw snack would be the perfect way to make my way through them. I was right, as usual.
There are various renditions of this recipe floating around the internet, but here’s my super cheesy (a.k.a. super noochy) take on it!

Cheesy Kale Chips
(Makes: It doesn’t matter because you’ll eat them all in one day anyways)
1 bunch curly kale
1 cup cashews (soaked for a couple hours)
1 red bell pepper, deseeded
Juice of half a lemon (2 tablespoons)
1/2 cup nutritional yeast
1 teaspoon sea salt (or to taste)
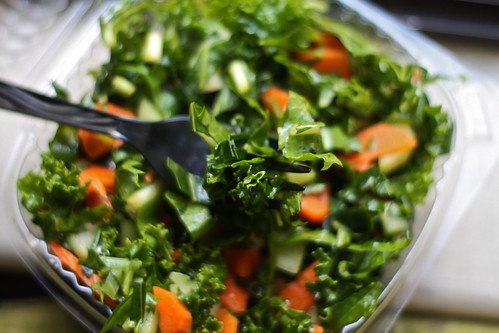
Remove the toughest parts of the kale stems (save them for a green smoothie, green juice, or add them to a stir-fry!), and tear the leaves into bite-size pieces.
Whenever I’m working with leafy greens – especially for this recipe, where I want the pieces of kale to be as dry as possible so that the coating will stick as well as possible – I find it easier to cut or rip up the leaves first, and wash them afterward by submerging them in a bowl of water. Then I swish them around with my hands a little so any debris can float to the top, drain them, and dry them in a salad spinner!
Place kale pieces in a large bowl (you want enough room so that you can mix the coating in later without having to deal with leaves falling out of the bowl!)
To make the cheesy coating: combine soaked cashews, bell pepper, lemon juice, nutritional yeast (nooch), and sea salt in a blender or food processor (a high-speed blender like the Vitamix is best), and run for a minute or two until smooth.
Add the cheesy coating to your bowl of kale and massage it in with your hands. Don’t worry too much about uneven distribution, as the big globs taste delicious in the final product!
For raw kale chips (my method of choice, as they will retain the nutrients and enzymes of all the healthful ingredients!): place on dehydrator screens and dehydrate at 115 degrees until crispy. The time will vary, but make sure ALL the moisture is gone and they are genuinely crunchy.
Alternatively (if you don’t have a dehydrator), spread kale pieces on parchment paper on baking trays, and bake at 200 degrees until crispy, about 45 minutes (but again, all that matters is that they MUST be crunchy).

Once you’ve tried the basic recipe, feel free to spice things up – literally! Sprinkle some cayenne into the coating mixture for a nice kick, or add some garlic or onion powder, cumin, or dill!


